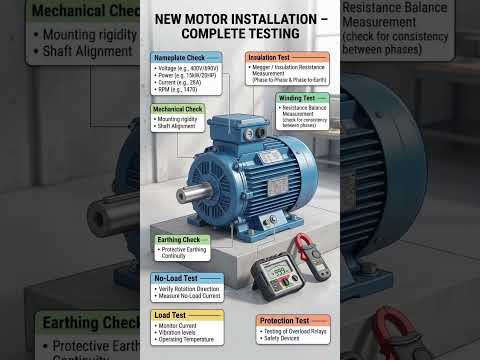
Installing an industrial or commercial motor requires precision and technical expertise. However, the process doesn’t end when the last bolt is tightened. To ensure operational efficiency and prevent premature failure, a comprehensive testing protocol is essential. Whether you are working in a large-scale factory or a specialized workshop, following a structured guide will save you from costly downtime and equipment damage.
Pre-Start Visual Inspections
Before flipping the switch, a thorough visual inspection is mandatory. Start by checking the mechanical alignment between the motor and the driven load. Misalignment is one of the leading causes of bearing failure and unnecessary vibration. Additionally, ensure that the cooling fans are completely unobstructed and that the mounting bolts are secured to the correct torque specifications. Double-check all electrical terminations in the conduit box to ensure they are tight, clean, and properly insulated.
Electrical Continuity and Insulation Resistance
One of the most critical steps in verifying a new motor installation is checking the insulation resistance. Using a megohmmeter (commonly known as a Megger), test the resistance between the windings and the motor frame (ground). High resistance indicates a healthy insulation system, while low readings could suggest moisture ingress or physical damage sustained during transit. You should also verify the continuity of the windings to ensure there are no open circuits before proceeding to the power-on stage.
The No-Load Run Test
Once the static tests are complete, it is time for the "No-Load" run. Energize the motor briefly to check the direction of rotation. If the shaft is spinning in the wrong direction for your application, simply swap two of the three supply leads (in the case of three-phase systems).
During this initial run, listen closely for unusual noises like grinding or clicking, and feel the casing for excessive vibrations. Use a calibrated multimeter or clamp meter to measure the starting and running current across all phases. These readings should be balanced and remain within the manufacturer’s rated limits found on the nameplate.
Conclusion
By following these fundamental steps, you ensure that your industrial equipment remains reliable and efficient for years to come. Proper testing isn't just a safety measure—it's a vital investment in your facility's long-term productivity. Always remember to document your test results to create a baseline for future maintenance schedules.